


Images play an important role in every aspect of digital life, be it for using on the website or blog, or adding them to make your presentation more interesting. But to get the most of the visual appeal, the images need to be of a specified size.
You can resize photos in Windows 10 operating system and there’s no problem if you are doing this for one or two photos. But what if you want to resize images in bulk? Well, you can do that using the Image Resizer feature.
For this, you will first need to install Microsoft PowerToys on your Windows 10 computer. It is an open-source program aimed at providing a set of tools for greater productivity. Using an in-built feature of the tool, images can be resized individually or in bulk right from the file explorer. Here is a step-by-step guide for the same.
How To Bulk Resize Images in Windows 10
Step 1: To resize images in bulk on your Windows 10 computer, you will first need to install PowerToys and then enable the option for Image Resizer. To download PowerToys, click on the button below and then click on the .exe file.
Step 2: Now, open the newly downloaded setup file for the PowerToys and follow the on-screen procedure to install it.
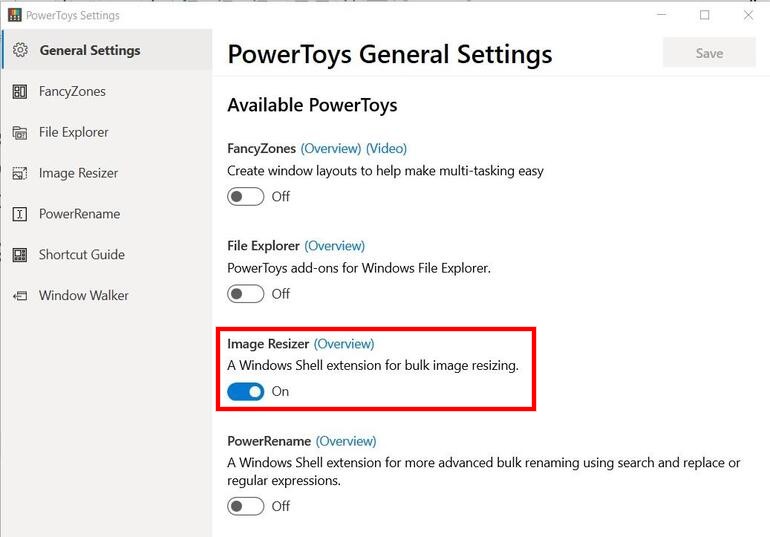
Step 3: Now, launch the PowerToys application on your system and go to the “Image Resizer” on the left-side pane. On the right side, toggle the switch on for the “Enable Image Resizer” option.
Step 4: Open the folder containing the images that you want to resize. Select all the images you want to resize and then right-click on the selection. From the context menu, click on the “Resize pictures” option.
Step 5: In the Image Resizer window that opens, select the preferred size from the default options or enter a custom size of your choice and then tap on the Resize button.
Once the process is completed, you will find the resized images in the same folder when the original images are stored. You can also configure the settings of the Image Resizer by opening the app. The settings that you can tweak include image sizes, encoding, file names, and more.
Changing Image Size
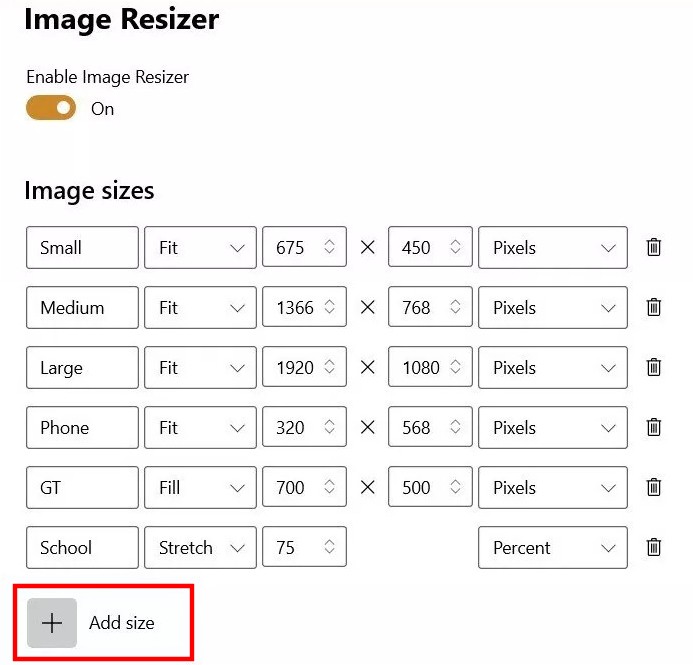
The settings screen for Image Resizer allows you to configure the output file’s sizes. By default, there are four sizes to choose from — Small, Medium, Large, and Phone, with different heights and widths in pixels. You can also define your own custom size for resizing images as per your needs.
You can also configure to resize the original picture instead of keeping the original file as it is and saving a copy of the file as a resized image. This is useful if you don’t have much storage space left or there’s no need for the original image after resizing.
Image Encoding
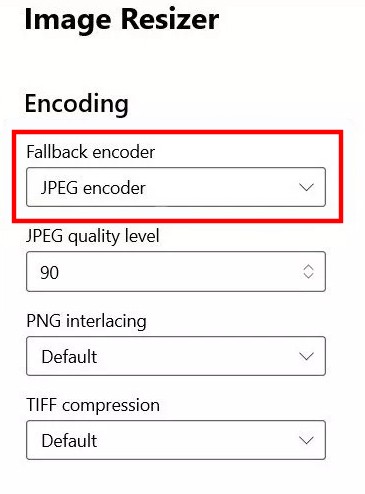
In the default configuration, the resized files are saved in the same format as the original. The image resizer cannot covert the file type but if the tool doesn’t recognize the original format, it will save the image in the user-specific folder as a fallback. You can configure it to save as JPEG, PNG, or TIFF and also define compression level.
File Naming
You can also choose to define the filename format for saving the resized images. It offers six variables that can be used, which include original filename, size name, selected width, selected height, actual width, and actual height.
You can keep the name as %1 – %2 and if the file name is ‘MobiGyaan’ and you are resizing it to ‘Phone’ size, the image will be saved as ‘MobiGyaan – Phone.’


More Stories
How to add multiple time zone clocks in Windows 10
How to uninstall Cortana in Windows 10 using PowerShell
2 Ways To Use Function Keys Without Pressing Fn Key On Windows 10