In Windows 10 operating system, you get a clock at the bottom of the screen in the right corner. This is the default configuration if you haven’t changed the position of the taskbar on your system.
The clock comes in handy to keep track of the time but what if you want clocks of additional time zones? Well, Microsoft allows users to add clocks of other time zones in the taskbar. This is really useful if you are juggling between two time zones for whatever reason — work or personal.
In this step-by-step guide, we will show you how to add more clocks in the taskbar from different time zones on your Windows 10 computer.
Adding multiple time zone clocks in Windows 10
Step 1: Open the Settings application on your Windows 10 computer. For this, search for Settings in the Start Menu and select the app from the search results.
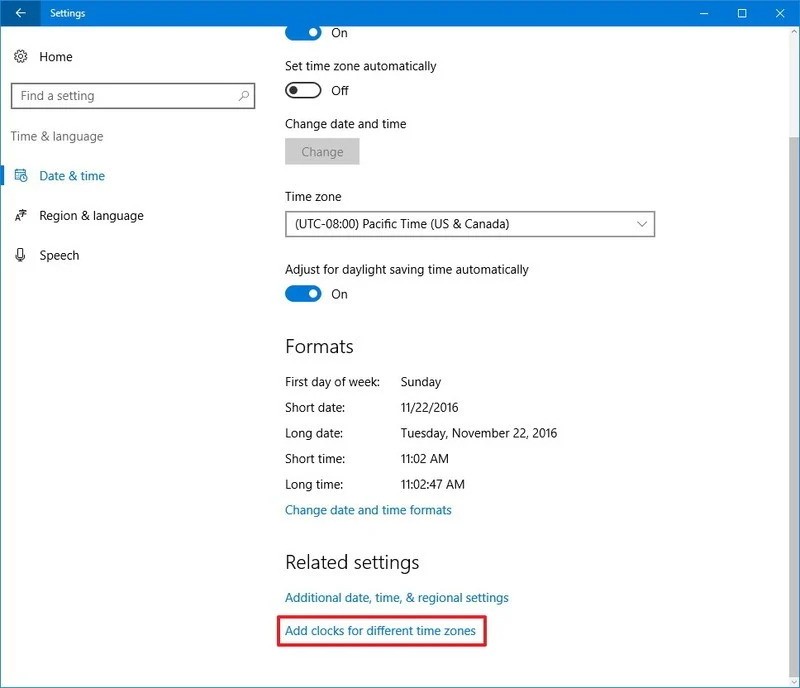
Step 2: When the Settings app opens, click on the “Time & Language” option.
Step 3: Click on the “Add clocks for different time zones” option found under the Related Settings section.

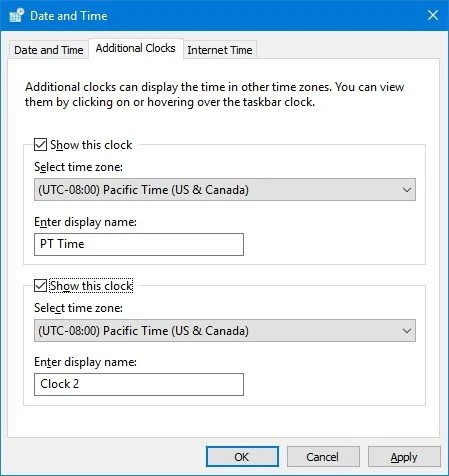
Step 4: In the new “Date & Time” window that appears, click on the “Additional Clocks” tab at the top.
Step 5: Now, click on “Enable Clock 1” and “Enable Clock 2” and change the time zone for each of them. After you are done with the changes, click the “Ok” button.

That’s it. You now have clocks from different time zones on your Windows-powered computer’s taskbar. To view these clocks, click on the clock at the bottom-right corner on the taskbar or just hover your mouse over it.


More Stories
How to uninstall Cortana in Windows 10 using PowerShell
How to bulk resize images in Windows 10 using PowerToys
2 Ways To Use Function Keys Without Pressing Fn Key On Windows 10